5 Classroom Activities Using Split Screen on Your SMART Board
Christine Bell
Editor
Classroom Tools
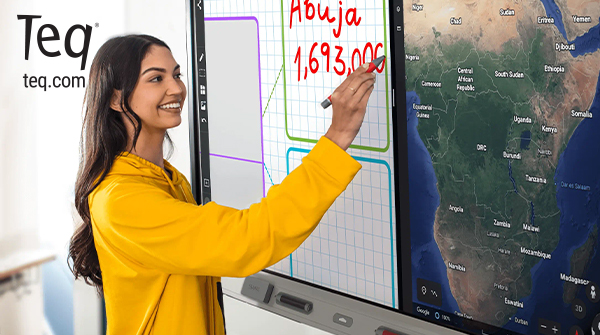
Interactive flat panels like SMART Boards are ubiquitous in classrooms these days. You’re probably using your SMART Board regularly, but are you getting the most out of all its tools and functions? If you’re like most educators, you’ve probably got your favorite methods and shortcuts on your trusty board. Maybe you’ve got a few clever tricks up your sleeve that are under-used by other teachers. We’re here to give you a few of our favorite functions, some you may be aware of but not using regularly and others that might be a surprise. Plus, these ideas can be used in ANY lesson! Take a peek at our top 5 classroom activities using split screen on your SMART Board. Make sure to take this year’s lessons to the next level and book a demo to see it in action.
1. Live note taking
What would we do without video? It’s changed the face of education in the last few decades. Gone are the days of rolling in the TV cart and handing out a worksheet. Now you can use your SMART Board to show videos and clips the enhance any lesson. Additionally, you can use the whiteboard feature to take notes while simultaneously watching an educational video on a second open window. This is a great way to use your SMART Board during station time with small groups of students. It can also be used during whole class instruction in multiple ways. You can model note taking for students, have a student demonstrate or show their thought process to the class, or have a small group of students take notes for the class while the others follow along.
You can even rotate students or groups as you go to create a whole class note document that can be shared with students on your LMS later. (For more annotation ideas, check out our course on Digital Tools for Student Annotation). With the split screen feature, opportunities are boundless, and it’s a great way to model multitasking, annotating, and more!
2. Kickstart an assignment
Speaking of modeling, who doesn’t love to start a lesson with a quick modeling activity to get the ball rolling? It’s a cornerstone of pedagogy for a reason! Support your students with a quick refresher on a skill or topic and get a head start on the task together as a class. This is a wonderful and easy way to scaffold for your students without too much heavy lifting on your part. To do this with your SMART Board, export or upload any lesson materials as a PDF on your display. Then, open them up and have your class work on the task together. One your PDF is open, you can use the whiteboard feature to list out details, come up with questions, or get to work on the first task in the assignment – whatever works best for that particular lesson.
The side-by-side view is an excellent way to provide visual cues and keeps students on track. Plus, this strategy can be used in any subject – practice problems for math, a review of the scientific method for experiments, identifying key details in literature, creating a timeline in social studies, the list goes on and on.
3. Use graphic organizers to help with group research projects
If you love a graphic organizer, this one is for you. What better way to help students organize their ideas than to pull up a browser for research and a graphic organizer on the very same screen? This can be done as a whole class activity where you can ask students to identify information and have a volunteer come write it in the organizer. This is also a great way to help students with their research skills. Have a small group of students search for relevant information using keywords, then determine if their source is credible. You can have the same group or a different group use that source to find relevant information and fill it in on the graphic organizer.
Once you have completed the graphic organizer, you can upload it as a PDF to your LMS to share with your students. Then, they can work individually to complete the next step of the research project, or even go back and add in additional info to the graphic organizer. You can use any materials you may already have, such as digital worksheets, or a selection from the library of pre-made graphic organizers on Lumio (and if you’re using Lumio to deliver lessons, we’ve got a quick tutorial on how to easily add this in to your lesson on the fly).
4. Stations, stations, stations
We’ve already mentioned how to use the split screen for video note taking as a station idea. However, there are many more ways to use this SMART Board feature as a station activity. Any lesson activity that lends itself to note taking would work well as a station activity. Additionally, perhaps you have something that requires a bit of creativity – drawing, creating a blueprint, brainstorming, etc. You can pull up a background on the whiteboard to support this with lined paper, graph paper, and other options.
SMART Ink has a multi-touch feature, meaning more than one student can be writing or drawing with the pens at the same time. This is makes your SMART Board the perfect interactive element to use with small groups of students during a station activity. You can even use multiple whiteboards or other apps to have students work simultaneously or even competitively within their groups. For example, have 2-4 students sketch an idea or make a mind map at the same time. Then, compare their ideas to come up with a unified answer as a group.
5. Use your second screen as a reminder
While your students are engaged in class work, you can use your split screen to keep important reminders on the board. Additionally, you can keep any other visuals or references that students may need for a particular task. For example, if students are working on a close reading of a text in small groups, you will likely want to have the directions or scaffolding materials posted on your board. With split screen, you could have that and a motivational quote, a drawing of a scene from the text, your lesson progression for the day, a running to-do list, etc.
Basically, you want to think about using the split screen like you would use a widget, such as a timer. The best thing about split screen is how intuitive it is to use, as you can resize and switch between applications just like on any other Android device. Your students will definitely benefit from the additional elements and knowledge – the possibilities here are endless!
SMART resources on OTIS
With a bit of practice, we have no doubt that these ideas can become your tried-and-trusted methods for using the split screen feature on SMART to enhance your lessons. We’ve got plenty of other ideas, lessons, and how-tos on all things SMART in our library. Check out out courses and skills videos in the SMART category on OTIS. Then, head over to Lumio and scroll to the bottom of the Library main page to see the Active Learning Lessons by Teq category where we’ve shared customizable activities and lessons!
For more tips, tricks, and tools for teaching in and out of the classroom, check out more content on the Teq Talk blog or our YouTube channels OTIS for educators and Tequipment.
We also offer virtual professional development, training, and support with OTIS for educators. Explore the technology and strategies that spark student success — no matter where teaching or learning are happening!
Follow us on social:
![]() edteq
edteq ![]() OTIS4educators | Teq Products | iBlocks
OTIS4educators | Teq Products | iBlocks ![]() OTIS4educators | MyTeq
OTIS4educators | MyTeq ![]() Teq
Teq
0 thoughts on “5 Classroom Activities Using Split Screen on Your SMART Board”
Related Articles & Other Recommended Reading
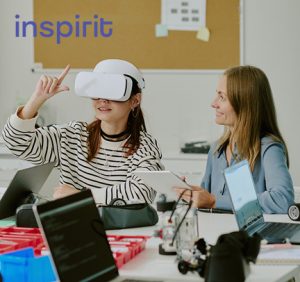
Bridging the Gap to Successful Project-Based Learning with Inspirit
There is no better way to complement your Project-Based Learning (PBL) initiatives than by creating engaging and interactive experiences in virtual reality (VR). VR provides users with a computer-generated simulation of a 3D image or environment that can be interacted with in a seemingly real and physical way. Inspirit offers user-friendly, innovative VR headsets that […]
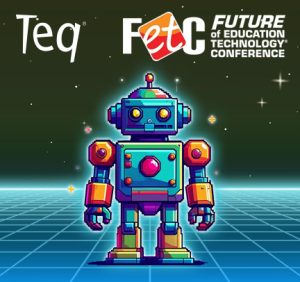
Teq is Headed to FETC!
Teq is off to the 2026 Future of Education Technology Conference (FETC)! Being held from January 11th to January 14th, 2026, this top-notch event is being hosted at the Orange County Convention Center in Orlando, FL! Demo innovative products, grab some swag, or say hello to the team at booth #2730. Tune in to interactive […]

Introducing the New AI Literacy and Instruction Micro-credential!
The landscape of K-12 education is rapidly evolving, driven by the emergence of Artificial Intelligence. Educators and administrators need more than just introductory knowledge; they need a structured, practical path to mastery. We are excited to announce the launch of the AI Literacy and Instruction Micro-credential Playlist! This comprehensive, seven-session video series is designed specifically […]